8.07.2012

Slow Cooker Pulled Chicken

This barbecue chicken recipe, a take on the popular pulled pork sandwich, was so unbelievably tender. This dinner came together in only 2 hours. Just grab some potato sandwich rolls, and pile them high with shredded chicken and a little more sauce. ( You can never have too much)
Whether you make these for dinner at home, as a causal meal for guest, or as a bite size slider for a summer shindig, I know these sandwiches will be a HIT!

  • 3-4 Boneless Skinless Chicken Breast
  • 1 Small Onion — Thinly Sliced 
  • 2 tablespoons dark brown sugar
  • 1 teaspoon Ancho Chili Powder
  • 1 teaspoon Garlic Powder
  • 1/2 teaspoon Cumin
  • 1 teaspoon Dry Mustard
  • 1 teaspoon Paprika
  • 1/8 teaspoon Red Pepper Flakes
  • 1/2 cup Ketchup
  • 1 cup of Sweet Baby Ray's Brown Sugar BBQ Sauce
  • 2 tablespoons Cider Vinegar
  • Salt & Pepper 
Lightly Salt and Pepper your chicken breast. Mix all the ingredients in a bowl, and add to the crock pot. Add your chicken, turn it on high and cook for two hours.

After two hours, take out the chicken. It should be 165 degrees.


Shred the chicken with two forks

 Add it back to the sauce

I added a slice of cheddar cheese and served it with baked beans, mac-n-cheese, and coleslaw. DELISH!


Happy Eating!
 
New York Style Cheesecake
I love a lot of food...especially desserts...But cheesecake, sweet, creamy, rich, decadent cheesecake it's my weakness. I absolutely adore it. It have made this cheesecake in so many ways, chocolate swirl, sweet potato, turtle...I just can't get enough! I hope you enjoy it!


Vanilla Wafer Crumb Crust
2 2/3 cup Vanilla Wafer Cookies
1 Tbsp of sugar
1 1/2 tsp of Vanilla Extract
4 Tbsp butter, melted and cooled

Preheat over to 350F.

In the food processor, whiz vanilla wafer cookies until reduced to crumbs. Add in sugar, vanilla extract and melted butter and pulse to combine. Mixture should resemble wet sand. Line the outside of the spring-form pan with aluminum foil.


Pour into a 9-inch spring-form pan and gently spread into an even layer over the bottom and sides. Press crumbs in firmly to create a tight crust. Bake for 10-12 minutes, until crust just begins to turn golden brown around the edges.   Cool completely before using.

Be mindful not to over bake it, remember it still has to bake with the cheesecake filling 

Cream Cheese Filling:
4 (8 Ounce) Packages of Cream Cheese
1 2/3 cup of Sugar
1/4 cup Corn of Starch
1 1/2 Tbsp of Pure Vanilla Extract
 2 Large Eggs
3/4 cup of Heavy Cream


Place one 8-ounce package of the cream cheese, 1/3 cup of the sugar, 1/2 Tbsp of Vanilla, and the cornstarch in a large bowl. Beat with an electric mixer on low until creamy, about 5 minutes. Then beat in the remaining 3 packages of the cream cheese. 


Increase the mixer speed to high and beat in the remaining 1 1/3 cups of the sugar and vanilla. Add in the eggs, one at a time, blending the batter completely after each one. Add the heavy cream.

 At this point mix the filling only until completely blended. Be careful not to over-mix the batter.

Gently spoon the filling on top of the baked Vanilla Wafer Crust. Place the spring-form pan in a large shallow pan containing hot water that comes about 1 inch up the side of the pan. (This is why you needed the aluminum foil) Bake the cheesecake until the center barely jiggles when you shake the pan, about 60 to 75 mins. Cool the cake on a wire rack for 1 hour. Then cover the cake with plastic wrap and refrigerate until it's completely cold, at least 4 hours or overnight. Remove the sides of the spring-form pan. Slide the cake off of the bottom of the pan onto a serving plate.


Strawberry Sauce: 
4 cups of Sliced Strawberries
2 Tbsp of Sugar
1/4 cup of Water
1  Tbsp of Lemon Juice

To start, make a strawberry puree by slowly heating strawberry slices with the cane sugar and lemon juice, until they are soft.


Strain the puree through a fine sieve to remove the seeds and excess pulp.  If you like your sauce lump you can avoid the straining process.


Happy Eating!


Nutella Dumplings

O-M-GEE!, is this ever so good!!!! If you are a Nutella fan like I am, you are going to be amazed how tasty this dessert is…and it is so easy to make! Chocolate and hazelnut is a flavor combo that I fell in love with when we were stationed in Italy. We ate scoops and scoops of Bacio gelato and candy.  Nutella can be used just the same way you might use peanut butter: on toast, in cookies, swirled in ice cream, etc. Or, just put a dollop in a wonton wrapper and fry it for less than 30 seconds and you get instant nutella dumplings. 


I know it's tempting to put a large quantity of Nutella inside, but please don't. 
You will regret it when it bursts open in your oil.
Ready to be fried =)


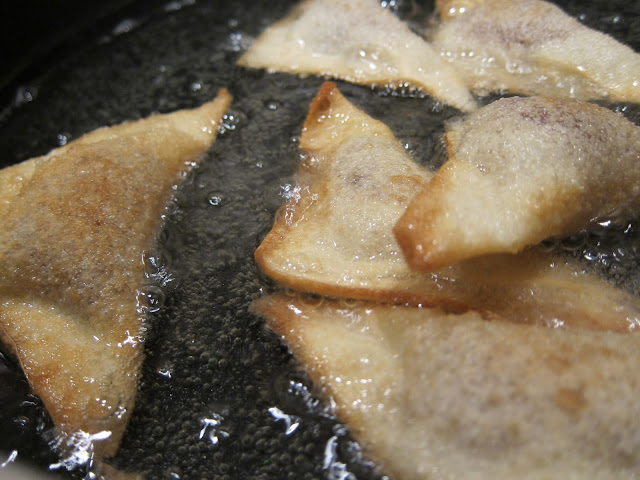
Fry them until they're golden brown and 
the Nutella will be nice, warm and gooey.

Ready to be devoured...I normally sprinkle a little powdered sugar for a garnish


What you'll need:

16 Wonton Wrappers
1 Egg beaten

1 jar Nutella
2 cups Vegetable oil

Powdered sugar for garnish (optional)

Heat your oil to 350 degrees

Place 1 wonton wrapper on your work surface. Brush the edges of the wrapper lightly with egg. Spoon 1 tablespoon of chocolate-hazelnut spread into the center of the wrapper. Fold the wrapper diagonally in half over the filling and press the edges of the wrapper to seal. Place the ravioli on the prepared baking sheet. Repeat with the remaining wonton wrappers, egg, and chocolate-hazelnut spread.

Gentle put them in the oil and cook until golden brown.Drain on a paper towel...and enjoy.


Happy Eating!